Showing posts with label gift. Show all posts

Monday, June 23, 2014

Stylin' Stampin' INKspiration ~ Masculine Monday

It's Monday folks! At Stylin' Stampin' INKspiration, that means it's Masculine Monday! Once again, I've created a card with a nautical theme. I am addicted to them! I really need to jump out of this rut, but it's such a fun one. Since this card has such a fun summertime look, I decided to submit it to SU-Only for Challenge #99! 

Usually when I create a card I start from the base and work up. I rarely set out with a plan. I like to see where the paper takes me. Yes, it takes about ten times longer to create something this way... but that's how I roll. So, I get all the way to the end and then try to decide what embellishments to use. But with this ribbon, I knew it was going to be a nautical themed card. How could it be anything else? Okay, maybe that's just an excuse to get to do another nautical card.

I am extremely obsessed with creating things in a trio. I stamped the fish, colored them, and cut them out only to realize I didn't do three of them. Oops! But I was in a hurry and didn't have time to make another one so I added the cute little chevrons instead. I really really like the new SU Wooden Elements embellishments! Since there were only two fish, I decided to break my rule and put only two Antique Brads on the bottom. What?!? I guess it doesn't look too bad. I'll let it go this time. he he


What I Used:
Cardstock ~ Crumb Cake, Whisper White, Cherry Cobbler
Ink ~ Crumb Cake, Cherry Cobbler, Bermuda Bay, Coastal Cabana, Cajun Craze, Pear Pizzazz, Night of Navy, Black StazOn
Stamp Sets ~ World Map, By the Tide
Tools/Other Supplies ~ Paper Trimmer, Paper Snips, Sponges, Blender Pen, Dimensionals, Glue Dots, All Purpose Liquid Adhesive, Sanding Block, Sticky Strip, Bone Folder, Paper Piercing Tool & Mat
Embellishments ~ Grosgrain Ribbon (Cherry Cobbler), Antique Brads, Essentials Wooden Elements, misc brass brads

Friday, May 16, 2014

Stylin' Stampin' INKspiration ~ Teacher Appreciation


I can't believe that this school year is almost over. Where has the time gone? My little ones are growing up way too fast! This fall I will have a Kindergartner and a 3rd Grader. What? 

As this year comes to an end, we wanted to celebrate our wonderful teachers. What comes to my mind when I think Teacher? Apples. I didn't want to wrap up just any apple, so I wrapped up a caramel apple. Perfect! Stampin' Up! What else do I think of? Chalkboards! So, I combined the two. This was a simple, quick project that I think their teachers will love.

Stop by Stylin' Stampin' INKspiration to check out some other wonderful Teacher Appreciation gifts!

*Chalkboard Technique
Using a sponge and Stampin' Up! Craft White ink, very lightly sponge the background in swirling motions till you're desired look is achieved. So simple!


Supplies
Cardstock ~ Basic Black, Whisper White
Ink ~ Craft White, White StazOn, Black StazOn, Cherry Cobbler
Stamp Sets ~ Chalk Talk
Tools ~ Chalk Talk Framelits, Paper Trimmer, Paper Snips, Big Shot, Dimensionals, Sponges, Gusseted Cellophane Bag
Embellishments ~ Cherry Cobbler Chevron Ribbon, Doilies 


Tuesday, April 1, 2014

Happy Mother's Day ~ From the Farm

I am a self-proclaimed "Junk Gypsy" and my husband will definitely confirm that! I collect everything, especially if it has rust on it. He is constantly shaking his head at what I drag home. Living on a farm, just means there is a whole lot of really cool things to collect! When I found this old chicken wire up in the barn, I knew instantly that I was going to incorporate it into a card somehow.

I designed this for my mother-in-Law. She loves chickens, so I thought this would be perfect for her. 


Supplies
Cardstock ~ Very Vanilla, Crumb Cake
Ink ~ Crisp Cantaloupe, Pear Pizzazz, Baked Brown Sugar
Stamp Sets ~ Hardwood, Stippled Blossoms, Perfect Pennants, Delightful Dozen
Tools ~ Paper Trimmer, Paper Snips, Ovals Collection Framelits, Banner punch, Sponges, Dimensionals, Adhesives, Hot Glue
Embellishments ~ Chicken Wire, Mini Brads

Monday, March 31, 2014

Happy Mother's Day ~ Happy Hydrangea's

Mother's Day is quickly approaching. I know it is just barely April, but it will be here before we know it. For once, I'm ready!

Hydrangeas are one of my favorite flowers and I know they are one of my Mom's as well. I set out to create this gorgeous flower using the same technique as I used for the Poppy flower centers. It is pretty simple. Stack the punched circles to form a "mountain" and glue these adorable little "clovers" all over. Time consuming.... yes. Worth it.... definitely!

I wanted more subtle colors for the flower, so instead of using colored cardstock, I sponged the colors onto White cardstock. It also allowed me to get a variation in colors.


Supplies
Cardstock ~ Wisteria Wonder, Pink Pirouette, Soft Sky, Whisper White, Pistachio Pudding Core'dinations
Ink ~ Daffodil Delight, Wisteria Wonder, Strawberry Slush, Tempting Turquoise, Basic Black
Stamp Sets ~ Teeny Tiny Wishes
Tools ~ Paper Trimmer, Paper Snips, Honeycomb embossing folder, Window Frames Collection Framelits, Paper Piercing  Tool, Itty Bitty Shapes Punch Pack, Word Window Punch, Dimensionals, 1" Circle punch, 1 3/8" Circle Punch, 1 3/4" Circle Punch, 2 1/2" Circle Punch, Sponges
Embellishments ~ Pearls Basic Jewels, white satin ribbon

Sunday, February 23, 2014

Retro Sketch Sunday #103

There is a new sketch challenge at Retro Sketches today. It is a fun little sketch. A tag! I love tags, they're something that you can use anytime. They are so much fun to make. This sketch was fun because it had a lot of room for creativity. I'm in love with Nautical themes, I needed a masculine tag, and I needed something for Father's Day (yes, I know it's early). This was the perfect project to fill those requirements!

The Sketch:

Here's my take:


Supplies
Cardstock ~ Crumb Cake, Island Indigo, Very Vanilla, Baked Brown Sugar
Ink ~ Real Red, Cherry Cobbler, Midnight Muse, Night of Navy, Baked Brown Sugar, Tempting Turquoise, Old Olive, Pumpkin Pie
Stamp Sets ~ Off the Grid, The Open Sea, By the Tide, Teeny Tiny Wishes
Tools ~ Paper Trimmer, Paper Snips, Itty Bitty Shapes punch, Word Window punch, Itty Bitty Banner Framelits, Dimensionals, Adhesives, Blender Pen, Distress Tool
Embellishments ~ Stampin' Up! Eyelets (retired), Antique Brads, Bakers Twine


Friday, February 14, 2014

Happy Valentine's Day!!!

Happy Valentine's Day to you all! I hope you all are feeling loved today. I am very excited for tonight. We are having a quiet dinner at home with the kids. I've made a special treat just for them. Strawberry Cheesecake! Not only is it their favorite, but it's wrapped up in this ADORABLE little jar with a sweet little Valentine note for each of them. I hope they like them!


Supplies
Cardstock ~ Pool Party, Whisper White
DSP ~ Fresh Prints
Ink ~ Real Red
Stamp Set ~ Hearts a Flutter
Tools ~ Paper Trimmer, 3/16" corner round punch, Itty Bitty Banner framelits, Hearts a Flutter framelits, Dimensionals, hole punch
Embellishments ~ Red yarn

Strawberry Cheesecake Recipe:
4 - 5 mini Mason jars
8oz. Cream Cheese
8oz. Cool Whip
1/2 cup Powdered Sugar
1/2 tsp. Vanilla Extract
1/2 tsp. lemon juice

Combine all ingredients in a large bowl and whip until smooth and fluffy. I used my whisk attachment on medium – high speed for a minute or two.

Crust:
9 Honey Graham Crackers (crushed)
1/3 cup Butter (melted)

Crush the graham crackers into crumbs and drizzle melted butter into the bowl. Press the crust mixture into the bottom of your jar. 

Layer crust, cheesecake to assemble your pie. Then, I topped it with a can of strawberry pie filling.
Enjoy!!!

Wednesday, February 12, 2014

Happy Easter... a Watercolor Wine Tag

I've been on an Easter kick lately. Here it is, not even Valentine's Day yet and my sights are already set on the next Holiday. Ever since the new Stampin' Up! Occasions catalog came out, I've been eyeing the {Happy Watercolor} stamp set. I mean, that flower stamp is FABULOUS! It immediately caught my eye. I knew I had to make it POP out and come to life!


My approach to making these flowers "POP" was to create several layers. The first layer is stamped directly onto the Baked Brown Sugar cardstock. I colored the middle layer with a marker. The top layer was colored with a Blender Pen. I highlighted the details on the flower with coordinating markers. The center of the flower was colored with the fine point of the marker and then I added a dot of Crystal Effects to the center. The edges of the petals were curled out with a bone folder. The stem was colored with a Lucky Limeade marker.


Supplies
Cardstock ~ Early Espresso, Baked Brown Sugar, Whisper White
Ink ~ Baked Brown Sugar, Calypso Coral, Daffodil Delight, Real Red, Crisp Cantaloupe, Lucky Limeade, Basic Black, Black StazOn
Stamp Sets ~ Hardwood, Happy Watercolor, Delightful Dozen
Tools ~ Paper Trimmer, Paper Snips, 1" Square punch, Crystal Effects, Blender Pen, Dimensionals, Glue Dots, Anywhere Glue Stick, Apothecary Accent Framelits, Bone Folder, Glimmer Paper, 1 3/4" Circle punch

Dimensions:
3" x 7 3/4" (score @ 3")

Wine tags... You're the Best!

I live smack dab in the middle of wine country. Yeah, it's rough. There are so many wonderful wineries out here it's ridiculous. So, I thought I'd make some cute little wine tags. It's so much fun to give a bottle of my favorite to a loved one, but it's even better to be able to personalize it.


I absolutely LOVE this color combination. Summer Starfruit, Midnight Muse and Crumb Cake. How fabulous is that? I love that it's masculine and modern. 


Supplies
Cardstock ~ Midnight Muse, Very Vanilla, Crumb Cake, Summer Starfruit
Ink ~ Crumb Cake, Summer Starfruit, Midnight Muse
Stamp Sets ~ Geometrical, Hello Lovely, Peachy Keen, Gorgeous Grunge, Off the Grid
Tools ~ Paper Trimmer, Paper Snips, Dimensionals, Anywhere Glue Stick, Decorative Label punch, 1" Square punch, Stamp-a-ma-jig, 1 3/4" Circle punch
Embellishments ~ brass brads

Wine tag dimensions: 3" x 7 3/4" (score @ 3")


Wednesday, February 5, 2014

Valentine Treats ~ A Class Act

I love Valentine's Day. The kids get so excited, especially since their classes have parties! Who doesn't love a party? I am lucky enough to get to help out at school for various things, and parties are my favorite too! So, I've been working very hard on treats for them to give to their friends. My daughter {Kylie} is in the 2nd grade and my son {Preston} is in preschool. I had a lot of treats to make, to say the least.

Preston only has 8 kids in his class. They are all boys! Can you imagine the craziness? I absolutely LOVE this class. It's always highly entertaining! I wanted something simple for them. They're going to rip into it anyway so I didn't want to put TOO much time into them. Here is what I came up with. I totally {dig} them!


Supplies
Cardstock ~ Real Red, Soft Sky, Whisper White
DSP ~ Fresh Prints
Ink ~ Real Red
Stamp Set ~ I Dig You (retired)
Tools ~ 3/16" corner punch, treat cups, hearts a flutter framelits, itty bitty banner framelits, dimensionals, glue, hole punch
Embellishments ~ red yarn from my stash. I think I got it at Wal-Mart and it matched PERFECTLY!


Kylie's class treats were a little more complicated. She wanted to give the boys an assortment of candy. For the girls, she wanted to give little mani/pedi kits. Because this was last minute and I couldn't order any little kits, I put a few things together for a fairly reasonable price. Little mini nail polishes, mini nail files, candy necklaces and a chocolate heart. I think I spent about $20 for the whole class! Here is what we came up with. They went together pretty easily. WHEW!


Supplies
Cardstock ~ Real Red, Coastal Cabana, Whisper White
DSP ~ Fresh Prints
Ink ~ Real Red
Stamp Set ~ Happy Valentine's Day (single stamp retired)
Tools ~ Hearts a Flutter framelits, Itty Bitty Banner Framelits, dimensionals, small oval punch, glue dots, glue


Saturday, February 1, 2014

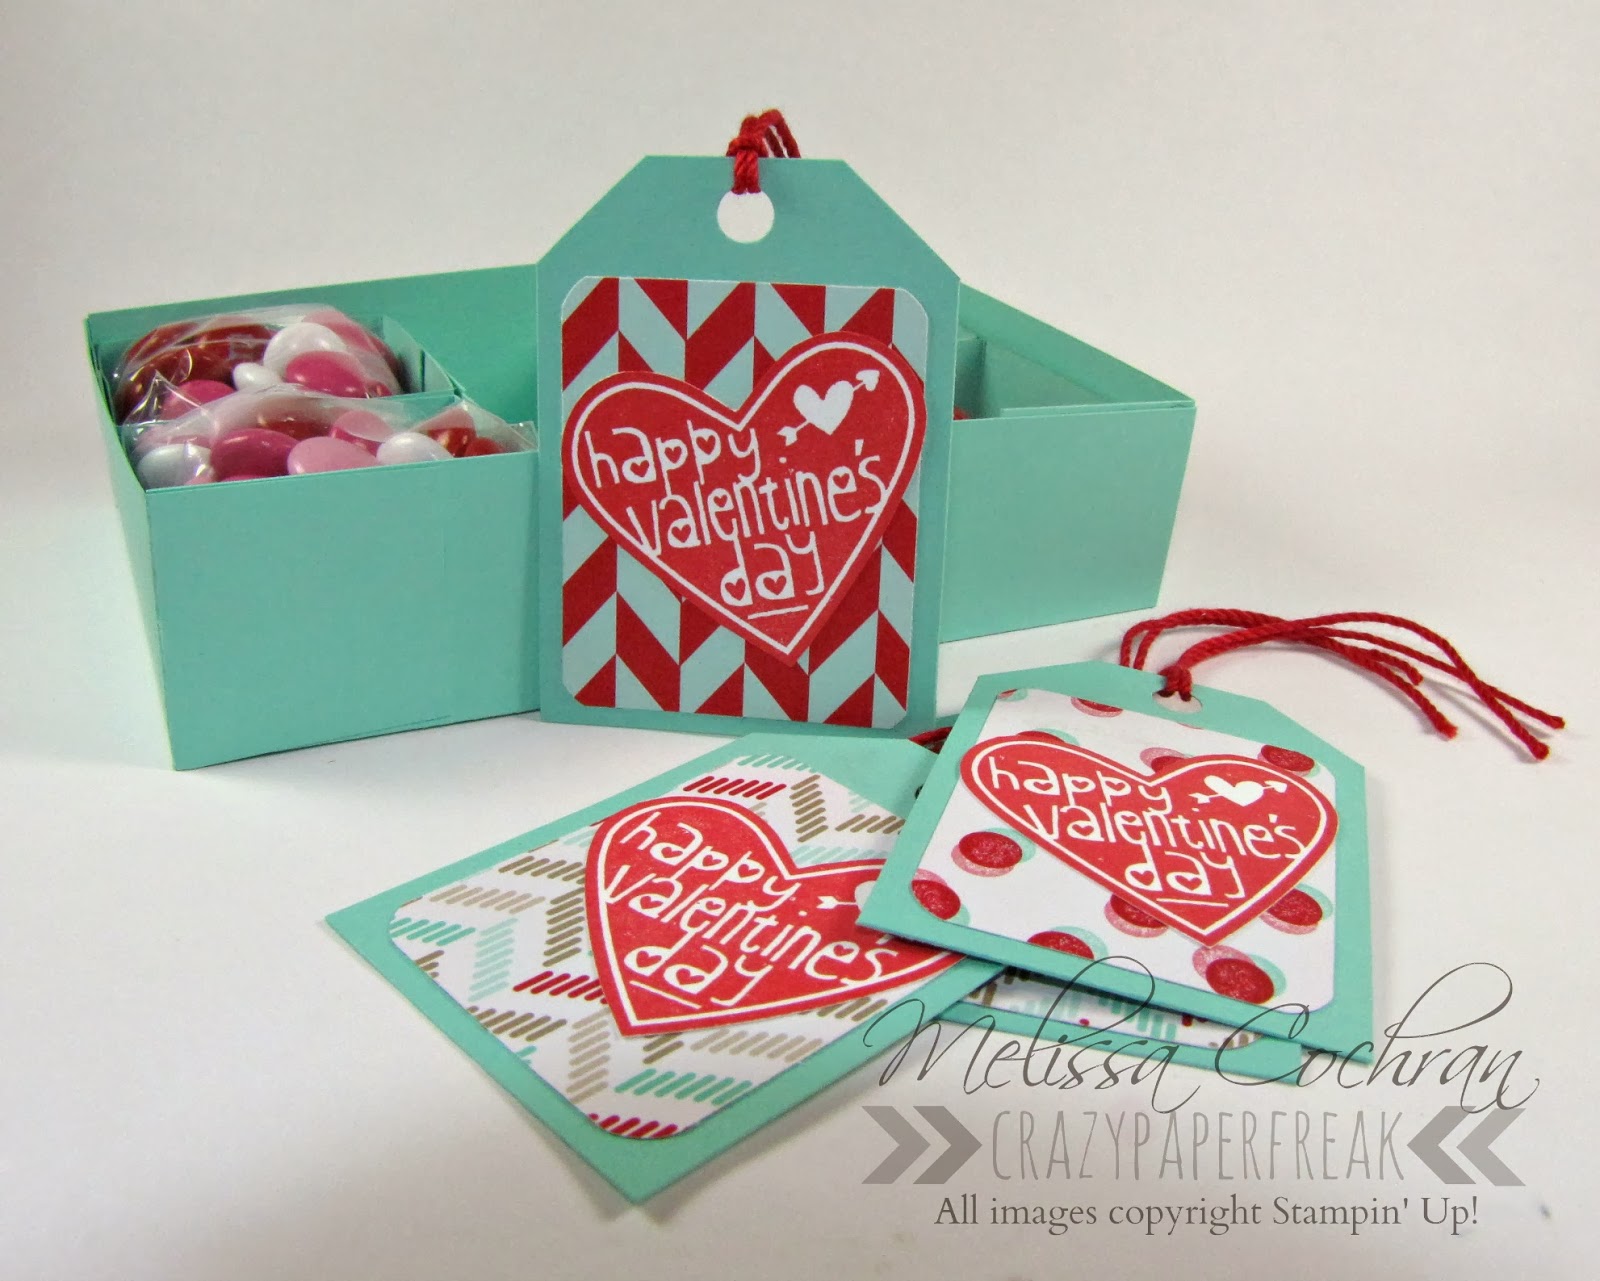
Valentine Candy Box

Who doesn't love to receive chocolate on Valentine's Day? I'm still scrambling for gifts to give on Valentine's Day. Yes, I know it's still 2 weeks away, but if I don't get it all done soon, it'll never happen. I'm not doing too bad, I have the kids' classes and teachers taken care of. Woo Hoo! But, I still have a few people left. You know, like my husband, the kids... only the most important people. Sigh...

So, today I got the idea to make up my own little candy box. This is such a cute little package. Three different types of candy and little mini gift tags. 


Mini gift tags inside

Cardstock cut to size. The DSP was used on the inside of the box.

My little trick to making the box "square"

Stamped window sheet 

Apply window sheet to the inside of the lid using glue dots.

Stuff with candy!


Supplies
Cardstock ~ Real Red, Coastal Cabana
DSP ~ Fresh Prints (Occasions Catalog)
Ink ~ Real Red, Coastal Cabana, StazOn (white)
Stamp Sets ~ Hearts a Flutter, Beautifully Baroque
Tools ~ Window Sheet, paper trimmer, paper snips, glue dots, snail runner, Deco Labels Framelits
Embellishments ~ Red string (not stampin' up)

Finished size: 4 1/2" x 6" x 1 1/4"

Dimensions
Base: 6 1/2" x 8" Score @ 1 1/4" on all four sides
Lid: 6 5/8" x 8 1/8" Score @ 1 1/4" on all four sides
Inner boxes: 3 7/8" x 3 7/8" Score @ 1" on all four sides


01 09 10