Friday, March 29, 2013

Distress Success!

I posted a tutorial on how to make a distressed flower this morning. I finally got a chance to sneak down to my craft cave after I fed the horses tonight. I can't believe how EASY this flower was to make!


Supplies used for this card:
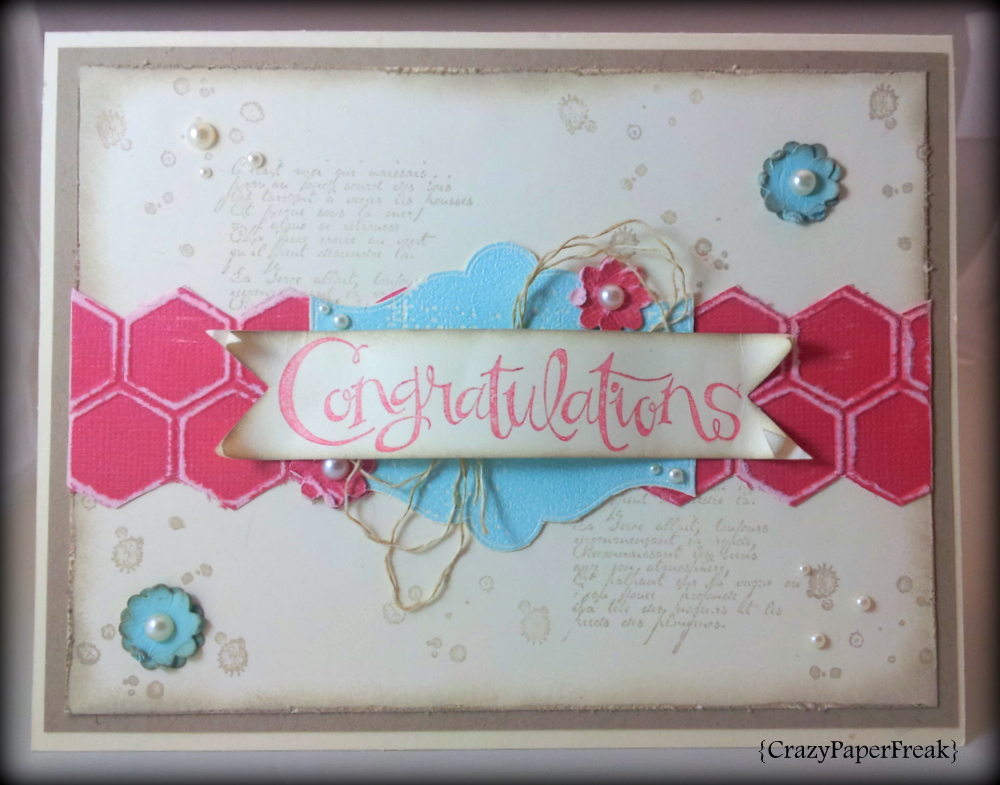
Paper ~ Very Vanilla, Crumb Cake, Core'dinations Card Stock in Primrose Petals
Ink ~ Primrose Petals
Stamp Sets ~ Hearts a Flutter, misc letter stamp
Other supplies used ~ Lacy Brocade Embossing Folder, Apothecary Framelits, Paper Punching tool, Antique Brads

*This card was entered in Freshly Made Sketches Challenge 79


Shredded Flower Tutorial

Here is another flower tutorial made by HandstampedStyle. This is so easy!


Flower created by Erin Gonzales at HandstampedStyle.com

Distressed Flower Tutorial

OMG I am in LOVE with this flower! I have been searching for a distressed embellishment and I think this is PERFECT! I stumbled upon this tutorial on Pinterest. It is my go-to place for inspiration. 


This tutorial was created by HandstampedStyle. She has SO many great ideas! 
I can't wait to get down to my craft cave to get some of these started! I can't believe how easy they are
 (or look to be)

Hope you enjoy this tutorial and go out an create your own!

Happy Stamping!

Thursday, March 28, 2013

Happy Easter!


I had ZERO time to create my Easter cards this year. It totally sneaked up on me. Okay, I wasn't really paying attention. I didn't get this "Easter Blessings" stamp until a few days ago. I can't create under pressure! 

This is a simple design. It went together easily {THANKFULLY}!

Supplies used for this card:
Paper ~ Core'dinations Card Stock in Primrose Petals, Very Vanilla, Pool Party, Crumb Cake, More Amore Specialty DSP
Ink ~ Primrose Petals, Sahara Sand, Crumb Cake
Stamp Sets ~ Easter Blessings, French Foliage
Other Supplies Used ~ Boho Blossoms Punch, Lacy Brocade Embossing Folder, Labels Collection Framelits, Crochet Trim, Sycamore Street Ribbon in Pool Party, Pearl Basic Jewels

Monday, March 25, 2013

Fabric Frenzy!!!


I've not yet used any of the designer fabrics from Stampin' Up! but I'm sure going to be playing with some now! You can't beat this deal. Contact me to order yours! Sale ends March 31st.


Friday, March 22, 2013

Puppy Love

This is Stella. She's joined our family about a month ago. She's nothing but fluff. She thinks her place is at my feet at all times. Include the crafting cave. Love this puppy!

The Truth?

My husband came down to my craft cave lastnight as I was putting away my recent Stampin' Up! order. He had a funny smirk on his face. Ok, more like an annoyed look. He wanted to know just how much my crafting cave has cost over the last year. Of course I rounded that number down. What he doesn't know won't hurt him! he he he

Thursday, March 21, 2013

This Too Shall Pass


I created this card today for a stamping challenge from MojoMonday

The sketch template:


Supplies Used for this card:
Paper ~ Very Vanilla, Soft Suede, Tea for Two DSP, First Edition DSP
Ink ~ Soft Suede, Crumb Cake, Calypso Coral
Stamp Sets ~ From My Heart
Other supplies used ~ Crochet ribbon, Labels Collection Framelits


Sentimental Thank you

I got to play in my craft cave almost ALL day today! I had so much fun creating this card. It was so simple and went together quickly. 

Supplies Used:
Paper ~ Very Vanilla, Chocolate Chip, First Edition Print DSP, Tea For Two DSP
Ink ~ Calypso Coral, Chocolate Chip
Stamp Sets ~ Feeling Sentimental, Itty Bitty Banners
Other Supplies ~ Bitty Banners Framelits, Labels Collection Framelits, Crochet Trim, Antique Brads, Basic Brads

Ground Zero

It litterally looks like a bomb went off in the craft cave. One project and it's blown to smithereens. Does anyone else feel like this when they're working on a project? 

Wednesday, March 20, 2013

Sprucing Up the Cave

I've been renovating my crafting cave lately. I refer to it as the "cave" because it's in an old forgotten corner of our dungeon-like basement. The kids don't like going down there so it's PERFECT for an insanely obsessed crafting freak like myself that doesn't like to be bothered every 2 minutes. A friend of mine turned me on to this website Stamp-n-Storage a while ago. I've been savin' the Benjamin's ever since.

60 Ink pad holder

48 marker holder

Paper punch holder

There are many different storage options available. These are just the ones I purchased. In retrospect, I should have gotten the ink/marker storage combo... but oh well. I'm in LOVE with my new cave!


Adding Glitter with an Embossing folder

I stumbled across this video on Pinterest today. It shows you how to add glitter with an embossing folder. GENIUS! I can't believe how simple this is. Thank GOD for Pinterest. Without it, I'd be a sitting duck.

Tuesday, March 19, 2013

Fork Bows


Everyone has been asking me WHAT in the world I was talking about when I posted on Facebook that I loved fork bows. I found the original video on Pinterest. Go figure. Here is the video. You'll never make a bow the "old" way ever again! This is so EASY!

Monthly Card Swap {April} Challenge

I joined a monthly card swap last month. It is hosted by one of my best gals. She is a fellow Stampin' Up! Demonstrator. There are 7 or 8 of us in the group. Each lady gets to choose a design idea for one month. This month's challenge has been created by my friend Erica. She has chosen the following:

Sketch Template:


Color Combination:

The Stampin' Up! colors that I am taking from this are:

Lucky Limeade, Tempting Turquoise, Night of Navy, Basic Grey, Sahara Sand
or
Lucky Limeade, Baja Breeze, Night of Navy, Basic Grey and Wisteria Wonder

Here is what I came up with. I liked it when I first completed it. I'm  not so much a fan now that I had to turn it in. All I see is room for improvement. LOTS of improvement. Oh well, on to the next!


Color Lab

Shut the front door! I was dinking around on the internet today. Trying to find some interesting color combinations. I stumbled upon this website for creating different combinations, or for ideas.

http://colorlab.mycreateink.com/

It's amazing! You can put together your own options, or use the options already available. They show ALL of the current Stampin' Up! colors, as well as an option for color matching different brand ink colors. HOLY COW!

I'll definitely be using this website for planning my next card!


Monday, March 18, 2013

Just Because

Just because I had nothing to do. Just because I was lonely. Just because I've been cooped up in the house on bed rest {I had surgery last week}. Just because I'm addicted, I created this card.


I fell in love with this stamp {Feeling Sentimental} set the moment I saw it. It totally fits into my vintage themed style. I put together a few different layers. Of course, I had to include my one of my favorite Stampin' Up! colors... Pool Party.

Sunday, March 17, 2013

Primrose Petals


These cards turned out exactly like I had pictured in my head! It's hard to see in the picture, but I raised the sentiments in the center and tacked them down on each end. I love the raised layered look! I also embossed the center shape on both cards. This one is from Everything Elenor set. The bottome one is from the Oh Hello set.

Stamp sets used:
~Fresh Foliage
~Sassy Salutations


I stole the design from Pinterest but made them each a little different. This seems to be a pattern. Oops! I fell in love with the layout. It's so simple. Layered stamping on the base and a few layers on top. Sweet and simple.

Stamp sets used:
~French Foliage
~Feeling Sentimental

Colors used for both cards:
~Very Vanilla
~Sahara Sand
~Crumbcake
~Pool Party
~Primrose Petals

Friday, March 15, 2013

Happy Day!

The photo doesn't do this card any justice. I really need to figure out a better way to photograph my cards. I have a lightbox, I just haven't had time to set it up yet. Truthfully, I don't have the room!

This card was created around some floral patterned paper that I had leftover from an old project. It's not Stampin' Up! paper so I rarely use it. However, it caught my eye as I was looking for inspiration. It just so happened that it went perfectly with River Rock, Soft Suede, Sahara Sand, and Very Vanilla. 

Of course I had to create a card that had a vintage feel. I antiqued the edges of almost every piece of paper. In fact, I think I did EVERY piece. I did the texture on the base color (River Rock) with a stylus and my Simply Scored plate. I went every 3/4" on the diagonal. I added pearls at every cross section. 

A few different layers of different shapes, a designer builder brad and a stamp from the "Ciao, Baby!" set completed this card. It was such a simple design. It went together so smoothly! I'll definitely be making a few more of these!


 I kept the inside of the card fairly simple. Antiqued the edges. Added a sentiment from the "Vintage Verses" stamp set and a "Happy Birthday" stamp on a banner of River Rock paper. 


Perfectly Perfect

 I totally stole this layout from a card I saw on Pinterest a few days ago. Good ole' Pinterest! I absolutely HAD to put one together. I love all the different layers. To me, you can't have too many layers! I used a couple of my new stamp sets for this one. Vintage Verses for the little note inside the envelope. Pretty Petites for a few of the squares on the banner. Along with a few from the 2012 - 2013 catalog. I also used the new designer brads from the Spring catalog. Of course I gave it an antiqued look. This is a generic card that can be used for any occasion.

The inside of the card is decorated too! I used my old favorite  Fresh Vintage for the outside trim in coordinating colors from the front. LOVE this look!
01 09 10