Wednesday, February 26, 2014

Emboss it!


Today at Stylin' Stampin' INKspiration, we're focusing on Embossing. I love heat embossing and I love texture embossing. So, I decided to do both for this card. 

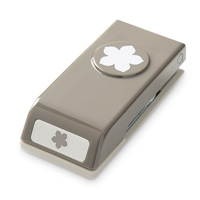
I'm in SPRING mode. I can't wait for green grass, flowers and sunny skies! I just love this new little stamp set {Petite Petals} from the Stampin' Up! Occasions catalog. There is also a coordinating punch to go with it. This was perfect for this card!

I got to try the {Stained Glass} technique for this card. I've never done it before, so it was a little challenging, but once I figured it out, I was on FIRE! 

Stained Glass Technique:
1. Stamp the image onto Vellum with VersaMark. 
2. Emboss with White Embossing powder and a heat gun. 
3. Punch the image out. 
4. Turn the image over and sponge/color the back side with ink or markers. 


* To make the stained glass flowers really pop, I backed them with white cardstock.


Supplies
Cardstock ~ sahara sand, whisper white
Ink ~ strawberry slush, pumpkin pie, lucky limeade
Stamp Sets ~ chalk talk, petite petals, everything eleanor
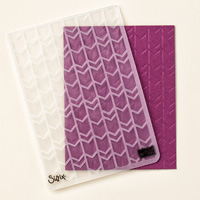
Tools ~ paper trimmer, paper snips, petite petals flower punch, arrows embossing folder, dimensionals, anywhere glue stick, glue dots, 1 1/4" circle punch, white emboss powder, heat gun, vellum, corner punch
Embellishments ~ pink yarn

Tuesday, February 25, 2014

Stylin' Stampin' INKspiration ~ Spiral Flower Die Tutorial


Today at Stylin' Stampin' INKspiration, I'm bragging about the new Stampin' Up! Spiral Flower die for the Big Shot. I just love it. I love making flowers, but they're always so time consuming. Stampin' Up! Has come up with a simple way to create gorgeous flowers, without spending hours to do them. 

One of the things that I really love about it, is that each flower is so unique and different. No two are alike! Another thing I love is that it really doesn't take THAT much paper. Just a 4 1/4" x 5 1/2" piece. It makes it pretty easy when you're using 8 1/2" x 11" cardstock. 

I am always at a loss when it comes to making wedding cards or gifts. I prefer a classy look, especially for a wedding, so while playing around with the Spiral Flower die it came to me. Lots and lots of flowers, all different sizes, in a few coordinating colors, on top of a box. Perfect! A few weeks ago I created a cute little candy box. The box was simple and quick to put together and I thought it would be the perfect size for this project. It worked out great!


Stampin' Up! Occasions 2014 catalog item# 129379

Supplies
Cardstock ~ whisper white, basic gray, smoky slate, perfect plum, wisteria wonder
Ink ~ White StazOn
Tools ~ embossing folder, paper trimmer, paper snips, spiral flower die, big shot. glue dots, hot glue, boho blossoms punch, flower punch
Embellishments ~ rhinestones basic jewels

Finished size: 4 1/2" x 6" x 1 1/4"

Dimensions
Base box: 6 1/2" x 8" Score @ 1 1/4" on all four sides
Lid: 6 5/8" x 8 1/8" Score @ 1 1/4" on all four sides

Sunday, February 23, 2014

Retro Sketch Sunday #103

There is a new sketch challenge at Retro Sketches today. It is a fun little sketch. A tag! I love tags, they're something that you can use anytime. They are so much fun to make. This sketch was fun because it had a lot of room for creativity. I'm in love with Nautical themes, I needed a masculine tag, and I needed something for Father's Day (yes, I know it's early). This was the perfect project to fill those requirements!

The Sketch:

Here's my take:


Supplies
Cardstock ~ Crumb Cake, Island Indigo, Very Vanilla, Baked Brown Sugar
Ink ~ Real Red, Cherry Cobbler, Midnight Muse, Night of Navy, Baked Brown Sugar, Tempting Turquoise, Old Olive, Pumpkin Pie
Stamp Sets ~ Off the Grid, The Open Sea, By the Tide, Teeny Tiny Wishes
Tools ~ Paper Trimmer, Paper Snips, Itty Bitty Shapes punch, Word Window punch, Itty Bitty Banner Framelits, Dimensionals, Adhesives, Blender Pen, Distress Tool
Embellishments ~ Stampin' Up! Eyelets (retired), Antique Brads, Bakers Twine


Wednesday, February 19, 2014

Stylin' Stampin' INKspiration ~ Create a Box!


Today at Stylin' Stampin' INKspiration, we're creating boxes! I know Valentine's Day is over, but who doesn't love to receive a cute little box of chocolates? I know I wouldn't turn it down!!!! Especially something as cute as this! I decided I wanted to be able to SEE inside the box without opening it. What better way than to use a window sheet? It was perfect for this little project. This was such a simple, quick to put together box, and so much FUN!


Supplies
Cardstock ~ Sahara Sand, Early Espresso, Whisper White, Crisp Cantaloupe
Ink ~ Crisp Cantaloupe
Stamp Sets ~ Petite Petals, Itty Bitty Banners
Tools ~ Paper Trimmer, Paper Snips, Big Shot, Deco Labels Framelits, Petite Petals punch, Itty Bitty Banner Framelits, Window Sheet, Adhesives, Boho Blossoms punch, Dimensionals
Embellishments ~ Linen Thread, Pearls Basic Jewels

Measurements
Finished box measures 3" x 3" x 1 1/2"
Sahara sand CS ~ 5" x 5"
Early Espresso CS ~ 5 7/8" x 5 7/8"

Monday, February 17, 2014

Easter Poppies

Easter is just around the corner. Can you believe it? It's crazy to think how quickly this year is going by. I remember when I was younger and impatient to be 16, my dad told me that time goes by faster and faster the older you get. Of course I thought he was exaggerating, but it turns out that he was right. I think time is flying by at mach speed!

With Easter on the horizon, I wanted to create a card that portrayed SPRING. To me, nothing says spring, more than bright beautiful flowers. I am absolutely IN LOVE with this {Pleasant Poppies} stamp. It has so many possibilities. I love possibilities! 

 I wanted to make these little beauties POP and stand out from the {Hardwood} background. They needed to be BRIGHT and cheery! To achieve that, I stamped them onto Whisper White cardstock, water colored them with a Blender Pen, then cut them out with my Paper Snips. Time consuming, yes. Worth it, definitely! 


Supplies
Cardstock ~ Pool Party, Baked Brown Sugar, Whisper White, Crisp Cantaloupe
Ink ~ Baked Brown Sugar, Lucky Limeade, Crisp Cantaloupe, Strawberry Slush, Daffodil Delight, Pink Pirouette, Black StazOn
Stamp Sets ~ Hardwood, Pleasant Poppies, Delightful Dozen, Happy Watercolor
Tools ~ Paper Trimmer, Paper Snips, Blender Pen, Deco Labels Framelits, Oval Framelits, Dimensionals, Adhesives
Embellishments ~ Crisp Cantaloupe yarn from the Sweet Sorbet Accessory Pack (SAB catalog)


Sunday, February 16, 2014

Thinking of Spring

Today I am dreaming of Spring. The beautiful sun has been shining all day. A rare treat for February in the Walla Walla Valley. This card just screams spring to me. I can't wait for the warm weather and all the beautiful flowers to bloom.


To create these flowers, I used a Blender Pen to achieve a "watercolor" effect. I highlighted the detail with a Strawberry Slush marker. The edges of the flower were curled using a Bone Folder. The layers were put together with Dimensionals.


Supplies
Cardstock ~ Smoky Slate, Whisper White
DSP ~ Watercolor Wonder
Ink ~ Crisp Cantaloupe, Daffodil Delight, Strawberry Slush, Lucky Limeade, Black StazOn
Stamp Sets ~ Happy Watercolor, Teeny Tiny Wishes
Tools ~ Paper Trimmer, Paper Snips, Window Label punch, Dimensionals, Blender Pen
Embellishments ~ Crisp Cantaloupe Ruffle Stretch Trim, Crisp Cantaloupe yarn from the Sweet Sorbet Accessory Pack (SAB catalog)

Friday, February 14, 2014

Happy Valentine's Day!!!

Happy Valentine's Day to you all! I hope you all are feeling loved today. I am very excited for tonight. We are having a quiet dinner at home with the kids. I've made a special treat just for them. Strawberry Cheesecake! Not only is it their favorite, but it's wrapped up in this ADORABLE little jar with a sweet little Valentine note for each of them. I hope they like them!


Supplies
Cardstock ~ Pool Party, Whisper White
DSP ~ Fresh Prints
Ink ~ Real Red
Stamp Set ~ Hearts a Flutter
Tools ~ Paper Trimmer, 3/16" corner round punch, Itty Bitty Banner framelits, Hearts a Flutter framelits, Dimensionals, hole punch
Embellishments ~ Red yarn

Strawberry Cheesecake Recipe:
4 - 5 mini Mason jars
8oz. Cream Cheese
8oz. Cool Whip
1/2 cup Powdered Sugar
1/2 tsp. Vanilla Extract
1/2 tsp. lemon juice

Combine all ingredients in a large bowl and whip until smooth and fluffy. I used my whisk attachment on medium – high speed for a minute or two.

Crust:
9 Honey Graham Crackers (crushed)
1/3 cup Butter (melted)

Crush the graham crackers into crumbs and drizzle melted butter into the bowl. Press the crust mixture into the bottom of your jar. 

Layer crust, cheesecake to assemble your pie. Then, I topped it with a can of strawberry pie filling.
Enjoy!!!

Wednesday, February 12, 2014

Happy Easter... a Watercolor Wine Tag

I've been on an Easter kick lately. Here it is, not even Valentine's Day yet and my sights are already set on the next Holiday. Ever since the new Stampin' Up! Occasions catalog came out, I've been eyeing the {Happy Watercolor} stamp set. I mean, that flower stamp is FABULOUS! It immediately caught my eye. I knew I had to make it POP out and come to life!


My approach to making these flowers "POP" was to create several layers. The first layer is stamped directly onto the Baked Brown Sugar cardstock. I colored the middle layer with a marker. The top layer was colored with a Blender Pen. I highlighted the details on the flower with coordinating markers. The center of the flower was colored with the fine point of the marker and then I added a dot of Crystal Effects to the center. The edges of the petals were curled out with a bone folder. The stem was colored with a Lucky Limeade marker.


Supplies
Cardstock ~ Early Espresso, Baked Brown Sugar, Whisper White
Ink ~ Baked Brown Sugar, Calypso Coral, Daffodil Delight, Real Red, Crisp Cantaloupe, Lucky Limeade, Basic Black, Black StazOn
Stamp Sets ~ Hardwood, Happy Watercolor, Delightful Dozen
Tools ~ Paper Trimmer, Paper Snips, 1" Square punch, Crystal Effects, Blender Pen, Dimensionals, Glue Dots, Anywhere Glue Stick, Apothecary Accent Framelits, Bone Folder, Glimmer Paper, 1 3/4" Circle punch

Dimensions:
3" x 7 3/4" (score @ 3")

Wine tags... You're the Best!

I live smack dab in the middle of wine country. Yeah, it's rough. There are so many wonderful wineries out here it's ridiculous. So, I thought I'd make some cute little wine tags. It's so much fun to give a bottle of my favorite to a loved one, but it's even better to be able to personalize it.


I absolutely LOVE this color combination. Summer Starfruit, Midnight Muse and Crumb Cake. How fabulous is that? I love that it's masculine and modern. 


Supplies
Cardstock ~ Midnight Muse, Very Vanilla, Crumb Cake, Summer Starfruit
Ink ~ Crumb Cake, Summer Starfruit, Midnight Muse
Stamp Sets ~ Geometrical, Hello Lovely, Peachy Keen, Gorgeous Grunge, Off the Grid
Tools ~ Paper Trimmer, Paper Snips, Dimensionals, Anywhere Glue Stick, Decorative Label punch, 1" Square punch, Stamp-a-ma-jig, 1 3/4" Circle punch
Embellishments ~ brass brads

Wine tag dimensions: 3" x 7 3/4" (score @ 3")


Monday, February 10, 2014

Stylin' Stampin' INKspiration February Card Sketch!


Today is Card Sketch day at Stylin' Stampin' INKspiration! This is just the cutest sketch and it was so much fun to play around with. There is lots of room for creativity too!


Here is my take!


Supplies
Cardstock ~ Baked Brown Sugar, Very Vanilla
Ink ~ Baked Brown Sugar, Crumb Cake, Old Olive, Crisp Cantaloupe, Summer Starfruit, Soft Suede
Stamp Sets ~ Postage Due, Geometrical, Postage Collection, Lovely Little Labels, Postcard, Banner Blast, Peachy Keen, Perfect Pennants
Tools ~ Banner punch, paper snips, dimensionals, Distress tool
Embellishments ~ Vintage Trinkets, Antique Brads

Sunday, February 9, 2014

February's Paper Crafters Sampler ~ Starburst Melange

It's that time again! Time to head on over to the Paper Crafters Sampler for the February edition. This month we focused on the Starburst. It's perfect for brightening up these winter blues. So, please stop by and purchase your February issue. You will find lots of gorgeous, and I mean GORGEOUS designs with directions so you can re-create these wonderful pieces.


My Sneak Peek